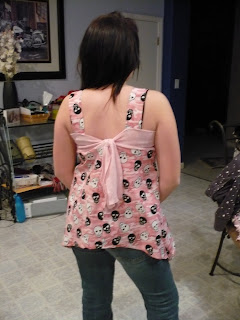


 Back in January I entered a drawing at Sierra Sewing Center for free classes (click on Sew-in-stitches title) and I WON! I never win anything, but this time it did! It was worth $100 so I put it towards a 4 week sewing class which started last Wednesday. It is a level I sewing class which is great, I have been playing around and taking quilting classes, however This class is geared towards garments. I made a shirt for Stevi.....which apparently will eventually fall apart, thankfully, she is still growing.
 The first class was more informational and we received our supply list which goes as follows:
- Palmer/Pletsch apron for Artists and chefs Pattern (#001) $8
- Fabric for apron (I chose purple and gold for the pocket)
- Construction thread to match or contrast (Gold of course to contrast)
- 60" tape measure
- Seam gauge
- Fine pins with glass heads, 1 3/8"(so you can iron over them and they don't melt)
- Pin cushion or magnetic tray
- Chalk marking pencil-color that will show up on your fabric (I have blue and white....thank you Liz for the heads up!)
- Scissors- 7",8" or 10" work well
- Small scissors with sharp tip
- Seam ripper (I broke my first one, now I have an industrial strength ripper!)
- Pen or Pencil and notepad.
- Clean Finish which is.. Staystitching 1/4" from cut edge. Turn fabric on stitched line and press. Stitch folded edge, using regular stitch length. Used to finish the edge of a facing or hem.
- Directional Staystitching..Single layer of fabric. Regular stitch length, 1/8" inside from finished seam. Use on curved an bias cut edges to keep them from stretching out of shape.
- 5/8" Seam..Use guide on machine throat plate. Press flat then press open. This is most common way of joining two pieces of fabric in garment construction. It is the standard seam allowance width.
- Grading...Trim the layers of seam allowance to different widths so they don't all end at one point. Used to eliminate bulk in seams. Prevents distinct ridge from showing on the right side.
- Understitching.....Press seam. Stitch from right side using regular stitch length. Pull seam allowances to facing side (not garment side) and catch all layers in stitching. Stitch 1/8" from seam. Used to keep seams in place and weight facing to keep it from flipping out.
- Clipping and Notching.....Clip inward curves. Notch outward curves. Pinking shears can be used for notching. Used to eliminate the bulk in seam allowance.
3 comments:
+ \
> \
+ \
Sorry. That started out as a face but didn't work. I just get really confused with all this home ec. stuff.
Jack has proof that you are an amazing sewer! He has a pirate quilt to prove it!
Post a Comment